
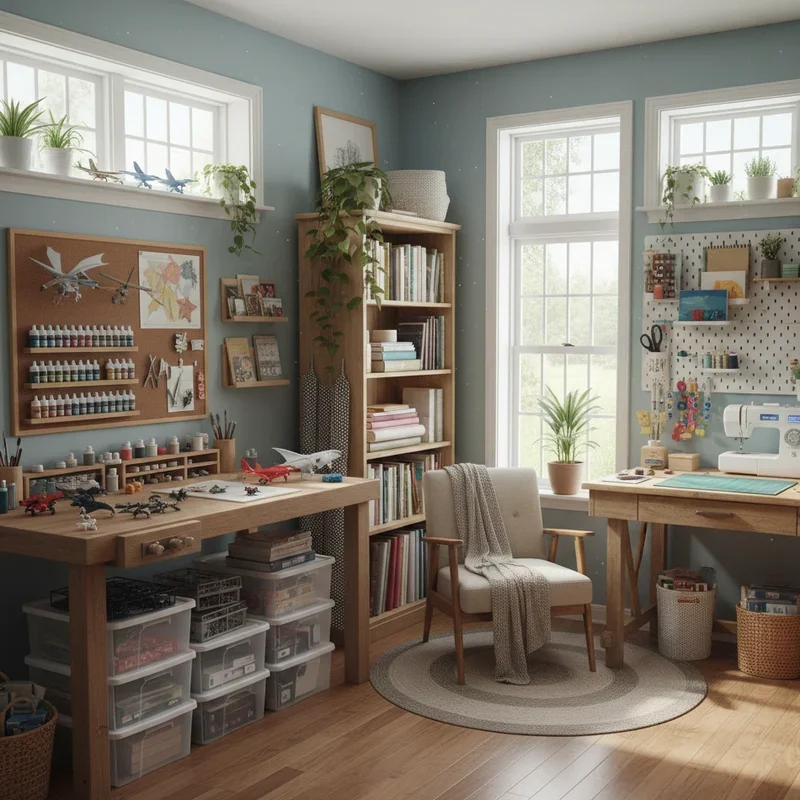
Detailed models demand more than a spare corner and a bright lamp. Effective model building workspace ideas create separate areas for assembly, painting, tool storage, and drying while keeping fragile parts safe. The goal is to make tiny components easier to control without turning the hobby area into an obstacle course of boxes and unfinished kits.
Start With a Stable Main Work Surface
A solid desk is the center of a model-building space. It should resist wobbling while you cut, sand, glue, or align delicate pieces. A replaceable cutting mat also protects the desk and gives you a consistent surface for precision work.
Depth matters as much as width. A desk that’s too shallow leaves paint, tools, instructions, and the model competing for the same small area.
While reviewing interior planning inspiration, notice how successful workspaces separate decorative objects from active surfaces. For model building, open desk space is often more valuable than another display item.
Keep Small Parts Visible and Contained
Tiny components are remarkably good at disappearing. Shallow trays, compartment boxes, magnetic dishes for appropriate metal parts, and labeled drawers reduce the chance of losing pieces between sessions.
Keep parts for the current project separate from the general supply collection. A dedicated project tray lets you clear the main desk without mixing wheels, decals, hardware, or subassemblies with unrelated kits.
Sort Tools by Frequency
Knives, tweezers, sanding sticks, sprue cutters, rulers, and commonly used adhesives belong within arm’s reach. Specialized tools can live farther away.
Browsing home organization references may provide storage inspiration, but hobby tools benefit from shallow organization because deep bins encourage stacking and searching.
| Workspace Zone | Useful Setup | Purpose |
|---|---|---|
| Assembly | Cutting mat and task light | Precision work |
| Small parts | Compartment trays | Prevents losses |
| Painting | Protected separate surface | Contains mess |
| Drying | Dust-protected shelf | Protects finishes |
Separate Painting From Assembly
Paint, sanding dust, adhesives, and finished surfaces don’t always coexist well. If possible, create a dedicated painting section away from the clean assembly area.
Hand painting usually requires less space than airbrushing, but both benefit from strong lighting and surfaces that can be cleaned easily. Follow product safety instructions for paints, solvents, adhesives, and ventilation requirements.
Some hobbyists collect layout ideas through general design reading before arranging shelves and cabinets. Whatever style you choose, don’t sacrifice safe airflow or convenient cleanup merely to make the station visually uniform.
Plan Storage for Kits and Finished Models
Unbuilt kits need dry, orderly storage where boxes aren’t crushed. Heavy kits belong lower on shelving, while lighter boxes can go higher.
Finished models present a different challenge. Open shelves provide quick access but collect dust, while enclosed display cabinets require more room and may limit the size of future builds. Leave some unused display capacity rather than filling every shelf immediately.
Documentation also deserves a place. Instruction sheets, reference photos, decals, spare parts, and notes from complicated builds are easier to manage when stored together.
Where Model Workspaces Often Go Wrong
The most common problem is trying to keep every tool on the desk. More tools can create less usable workspace, especially when delicate assemblies need room to rotate without hitting bottles or organizers.
Lighting is another overlooked issue. One ceiling fixture may illuminate the room but still cast shadows across tiny details. Task lighting positioned from more than one direction usually makes careful painting and assembly easier. Storage should support the work instead of surrounding it.
Frequently Asked Questions
What size desk is good for model building?
There isn’t one ideal size, but the surface should comfortably hold the model, cutting mat, instructions, and current tools at the same time. Larger scales and complex kits naturally require more depth and width.
How should small model parts be stored?
Use shallow compartment containers, labeled trays, or individual project boxes. Keeping each active build separate reduces the chance of mixing similar-looking pieces from different kits.
How can I reduce dust around finished models?
Enclosed display cabinets offer the strongest everyday protection. Regular cleaning, keeping sanding away from displays, and allowing painted parts to dry in protected areas can also reduce dust settling on finished surfaces.
Design for Precision, Not Maximum Storage
A productive model-building room gives your hands room to work and your smallest components nowhere to disappear. Start with a steady desk, strong lighting, and contained project storage before adding more cabinets. Separate messy and clean tasks where practical, then reserve protected space for completed builds. The result is a workspace that makes detailed projects easier to continue instead of harder to restart.